From time to time, it’s a good idea to completely wipe your Mac and start over with a clean system. Then, piece by piece, you only restore the things you actually need from your attached backup disk. However, a challenge with this approach is finding configurations and preferences of certain apps as those can be in various, sometimes hard to find, locations. In the case of WireGuard on macOS, it’s quite simple though—if you know where to look.
WireGuard stores the full tunnel configurations in the login keychain (not just the private keys). So in order to restore a tunnel, you have to find the login keychain in your backup.
Check out this path, relative to your backup drive:
Users/$your_user_name/Library/Keychains/Then follow these steps:
- Double-click
login.keychain-db. It will open in Keychain Access app. - Type in “wireguard” in the search box in the upper right.
- You should now see a list of all your WireGuard configuration profiles. Double-click the one you’d like to restore.
- Check the “Show password” checkbox—this will ask for the keychain’s password which should be the old user’s system password.
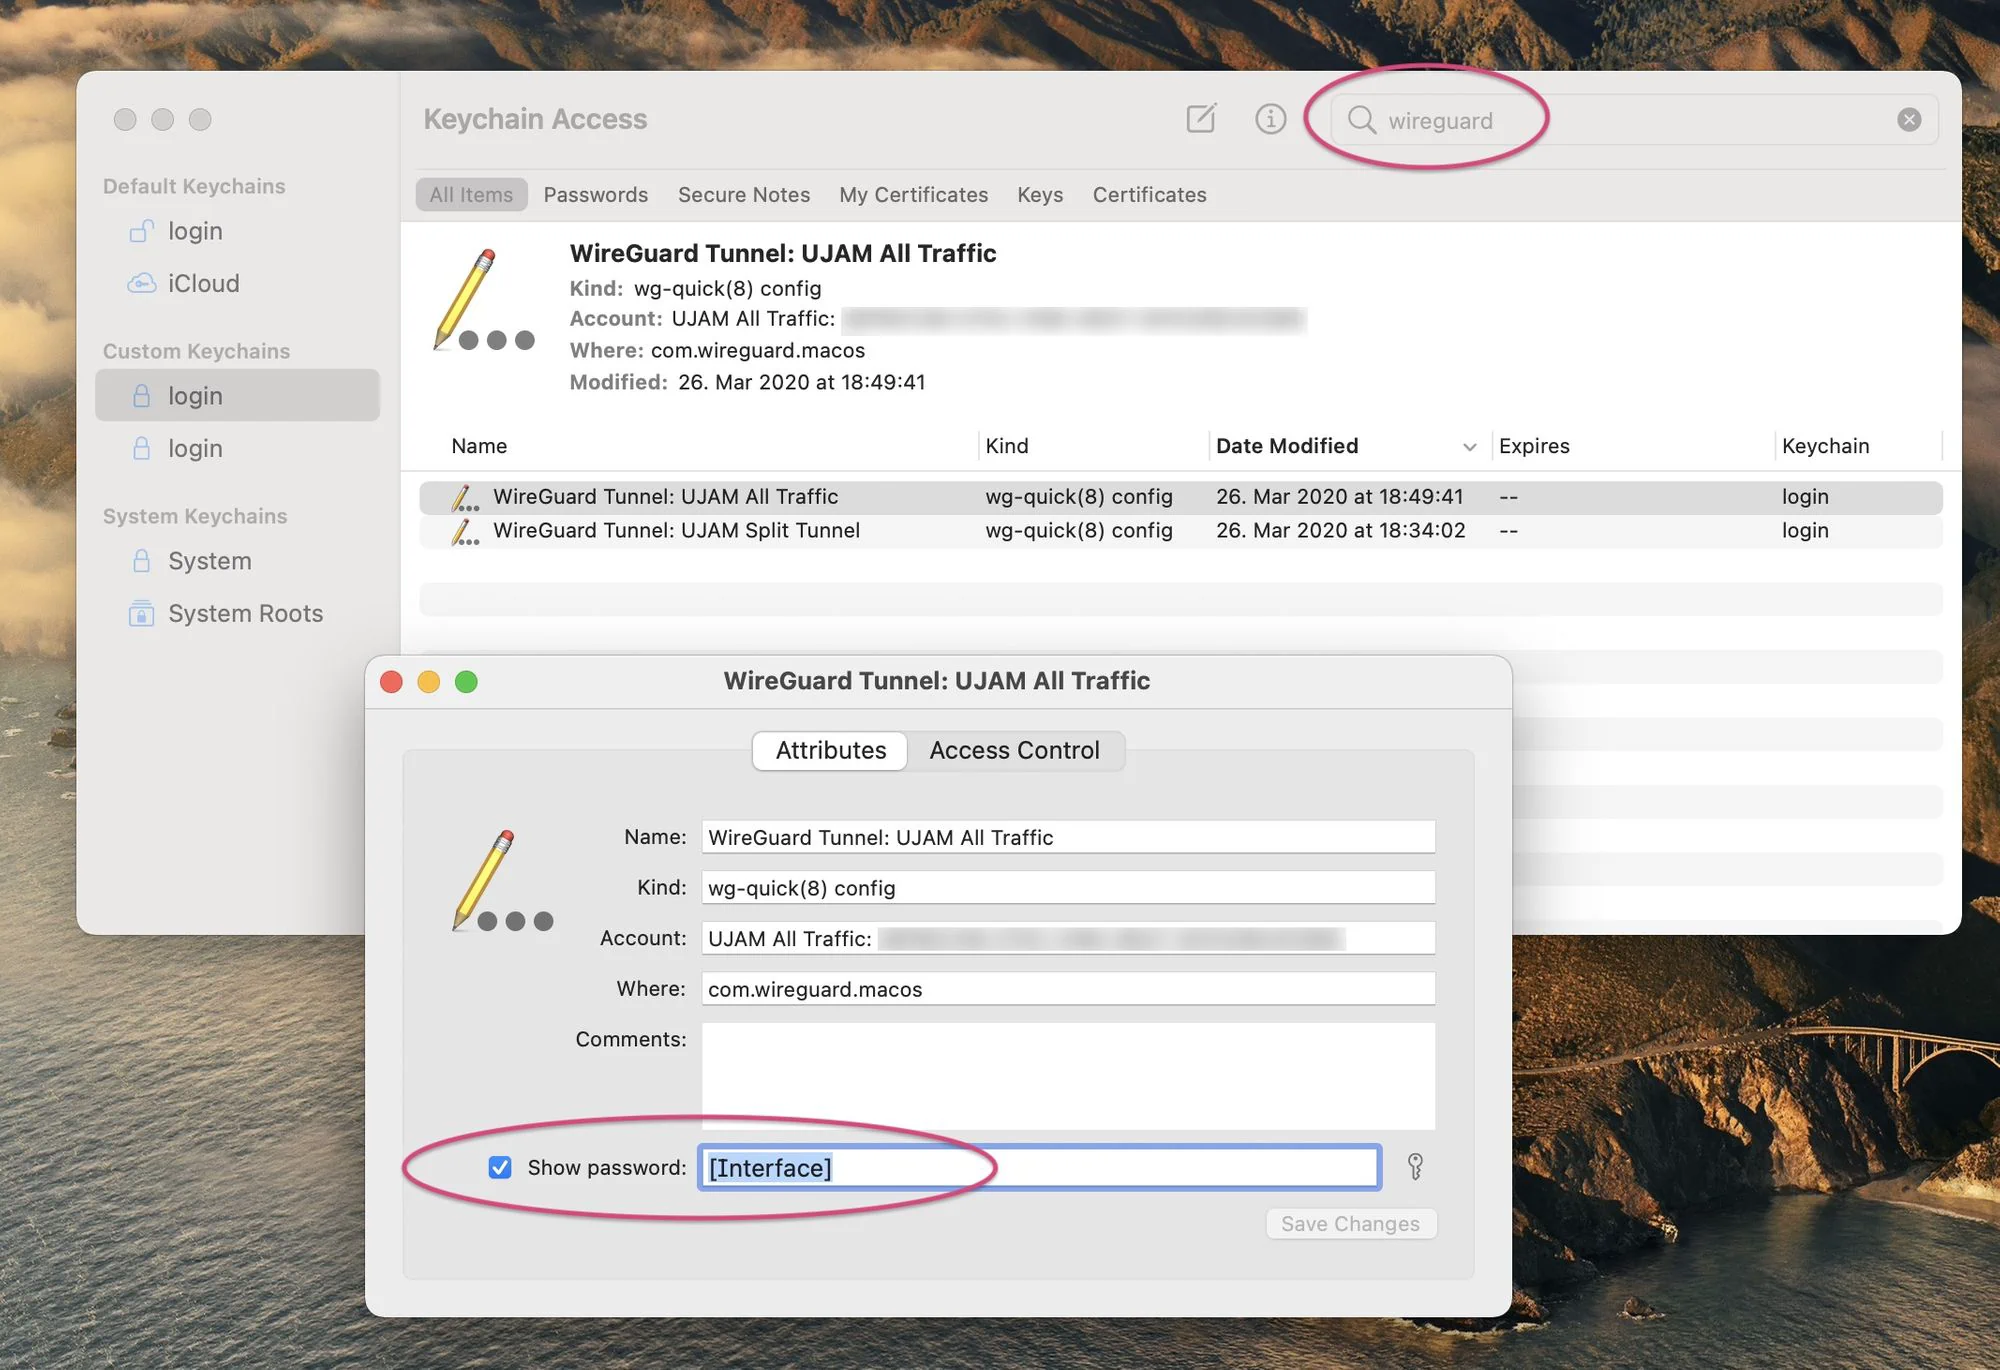
Here’s the interesting part: The password field contains the full tunnel configuration, including line breaks.
- Click into the password field (it’s probably showing the string “[Interface]”).
- Hit
Cmd + AandCmd + C(= select all, copy). - Open WireGuard.
- Click on the plus button in the lower right and select “Add empty tunnel…”
- Delete everything from the configuration field and paste your clipboard contents.
- Click “Save”.
Enjoy your restored tunnel configurations!